Rob's Derby Garage
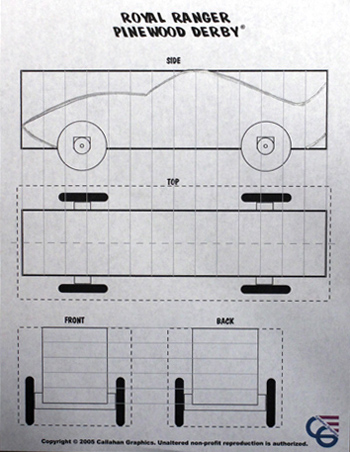
Step 1: Design your car. |
||
|---|---|---|
|
The first step in creating a first class Pinewood Derby car is to come up with a nice workable design for your car. If you are a beginner, I suggest that you keep the design simple. I have included some blank design sheets on the Derby Helpers page for you to download. Keep in mind that you will be cutting this car from a 1.5 inch thick block of wood. The various tools you have available for cutting and carving the wood may limit the detail and shape of your car design. |
|
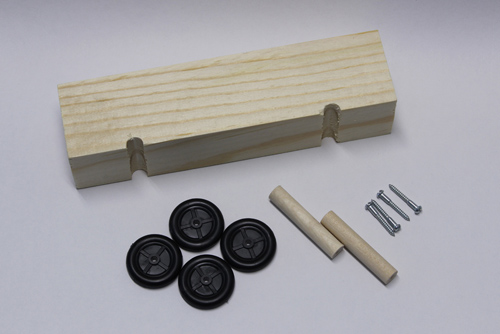
Step 2: Inventory your Pinewood Derby Car kit. |
|||||||||||||||||||||||||
|---|---|---|---|---|---|---|---|---|---|---|---|---|---|---|---|---|---|---|---|---|---|---|---|---|---|
|
It is important to make sure your kit has all the necessary parts you will need to complete your car. I put this down as step 2, but you really should have made sure all the parts were included with your kit when you received it. Either way, it is always good to periodically inventory your kit because the many small parts can be easily misplaced. The Royal Ranger style and the Boy Scout style kits are each different and will contain slightly different parts.
|
||||||||||||||||||||||||
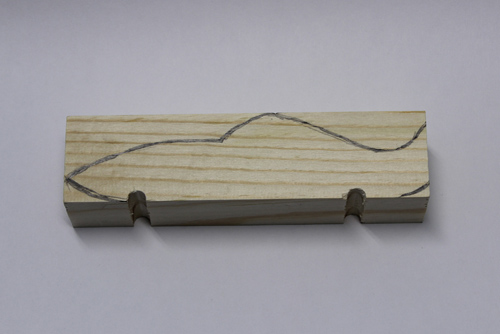
Step 3: Draw your design onto your wooden block. |
||
|---|---|---|
|
Transfer the design from step 1 onto your block of wood. There are several ways in which you can do this. First, if your design is simple, you can just look at your design sheet and redraw it onto your wood. Another way that seems to work well is to turn your design sheet over to the back, and with the side of your pencil, shade in the area on the opposite side of your car design. When you are done shading the area, fold the design sheet along all four bold line edges of the block image where you drew your initial design in. Place the design sheet over your block of wood. The folds should help line it up and keep it from moving too much. Next, trace over your design using a liberal amount of pressure. The pencil graphite that you shaded on the back will transfer to the block of wood like carbon paper. You can now darken the line on the actual wood block. |
|
Step 4: Cut out the car. |
||
|---|---|---|
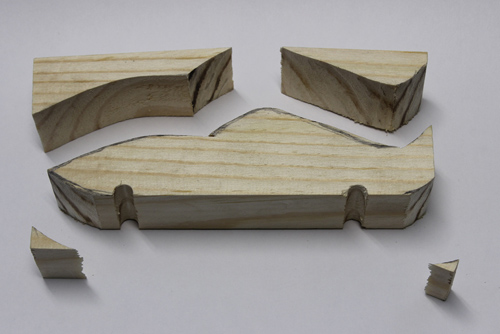
|
The easiest and most efficient way to cut out your car is to use a band saw or a scroll saw. If these are not available you can use a hand held coping saw. Follow the lines that you drew on the wood block. Use extreme caution when cutting out your car. Power tools can be dangerous if not used correctly. Children should only use saws under direct, close supervision of an adult. Once the car has been cut out, you can add details and shape the car using different wood carving tools. I prefer using a Dremel Rotary tool. After the car has been cut and shaped. You should use sandpaper to ensure a smooth finish for painting. Start with rough sandpaper (about 80-100 grit), and advance to a fine sandpaper (220 grit or higher). |
|
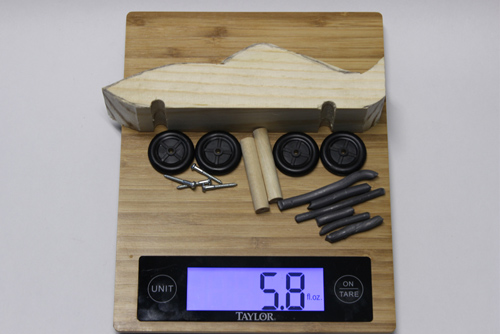
Step 5: Weigh your car. |
||
|---|---|---|

|
The weight of your Pinewood derby car is critical. The heavier your car is, the faster it will travel down the track, but if it is over-weight, you may be disqualified and not allowed to race. I prefer using a digital kitchen scale to weigh my car. The one pictured here, cost me about $18.00. It is worth the investment if you plan on making several cars. When getting the initial weight of the car be sure and include all the parts that you will be putting on the car. Don’t forget the four wheels, four screws, two axle dowels, and any other accessories you will be adding. Make note of your car’s weight. You may want to weigh your car a couple of times to ensure the weight is accurate. |
|
Step 6: Add weight to your car. |
||
|---|---|---|
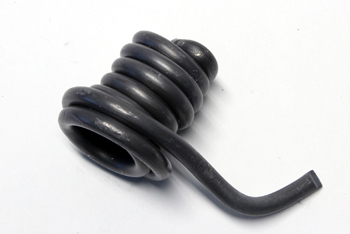
|
There are many methods for adding weight to your car. You can purchase sticker weights from most locations that sell Pinewood Derby supplies. This is by far the simplest way to go. You just peel and stick the correct amount of weight to the bottom of your car. I prefer to use lead salmon fishing weight that comes in a coil as pictured here. You can purchase it at most outdoor sporting goods stores. 3/8 or 1/4 inch diameter seems to work the best for me. |
|
|
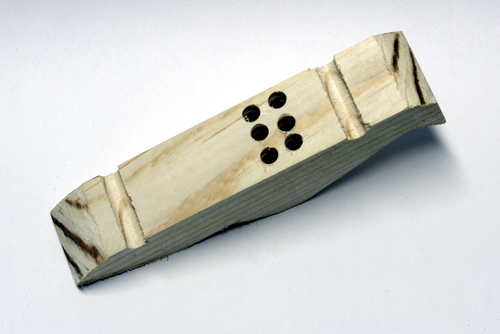
Cut lengths of the weight that are short enough to fit on or into the car. I continue to add them to the scale with the rest of the car parts until the weight is between about 0.3 to 0.2 ounces below the max allowed for the race. This will allow for the weight of the paint and any other accessory that hasn’t been weighed yet. You will need to check the official rules for your race to verify what the maximum weight limit is. Once in a while the car will already be at or above the desired weight, depending on the density of the wood block and the design you choose. If this is the case you will not need to add weight, but may need to drill out wood from the bottom of the car to lighten it. |
|
|
If you are using the lead salmon fishing weight method, you need to drill an appropriate number of holes, the same diameter as the lead, into the car to hold the weight. Be careful not to drill all the way through the car. A drill press with adjustable stops works best, but if you only have a hand drill available, you can place a piece of tape on the drill bit as a depth indicator. This will help you determine how deep your hole is. Once the holes are drilled insert the lead and fill the hole with wood putty. It is wise to check the weight again before filling in the holes with putty. |
|
Step 7: Paint your car. |
||
|---|---|---|

|
There are too many methods of painting your car to go into any detail here on this site. The simplest method is to use standard enamel spray paint. It is always best to use several light coats instead of one or two thick coats. When painting a car with lots of detail and different colors, I prefer to use crafters acrylic and some high quality artist paint brushes. Acrylic paint can be purchased at most craft stores for about a dollar a bottle. The acrylic paint most often has a flat finish, so after the paint dries, I like to use a clear spray lacquer to give the car a shiny gloss finish. A decent paint job takes a long time, so be sure and take that into account when scheduling time to build your Pinewood Derby car. |
|
Step 8: Prepair your axles and wheels. |
||
|---|---|---|
Rough Axle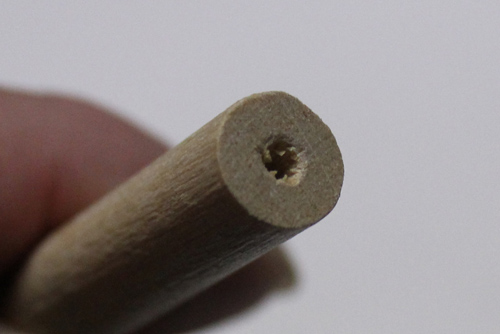
Smooth Axle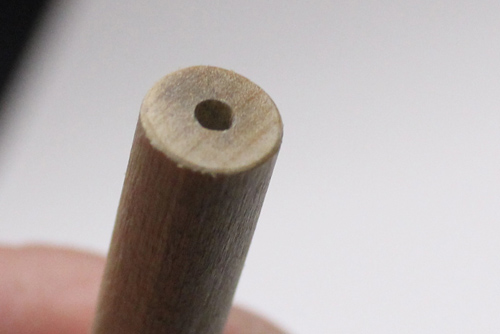
|
While the paint is drying, it is good to start working on your wheels. Start by sanding the end of your axles. This is the part where the wheel contacts the wood. The smoother you can make it, the less friction you will have between the wheel and axle dowel. As with preparing the car for painting, use sandpaper and work your way up to the finest grit you have. This will make the end surface as smooth as possible. I often finish it off with fine steel wool to get the smoothest finish. If you decide to paint the axel dowels, use caution to not get any paint on the end of the axle. If you are building the Boy Scout style kit, you should perform this same step on the side of the car around the slot for the axle nail. |
|
Wheel with Burs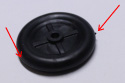
Sanded Wheel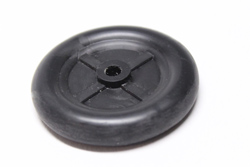
|
The manufacturing process for the plastic wheels leaves the edge of the wheel uneven and with small burs. These will dramatically reduce speed as they cause the car to bump and bounce down the track. Use a fine grit sandpaper to smooth out the wheel, but be cautious not to create any flat spots on the wheel. I usually finish off the wheels with steel wool to get the smoothest possible finish. |
|
|
Once the wheels and axle dowels are prepared, you need to assemble them. Place the axle screw through the wheel and then screw it into the axle dowel being careful to screw it in straight. Tighten the screws enough that the wheels are not wobbly, but still spin freely. If you are building a Boy Scout style kit you will obviously skip this step. |
|
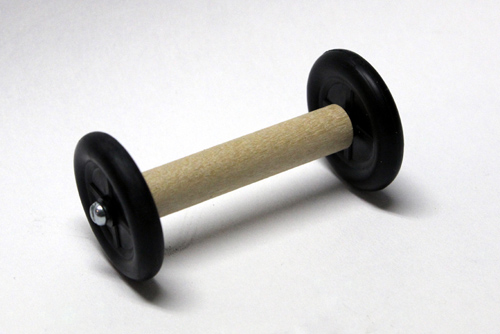
Step 9: Attach the wheels to your car. |
||
|---|---|---|
|
The final step in building Your Pinewood Derby car is to attach the wheels to the car. It is best to make sure the paint is completely dry before attaching the wheels. If you are building a Royal Ranger style kit, you need to glue the axles into the pre-cut groves on the bottom of the car. You can use pretty much any type of glue, as long as it holds the axles in place. I found that regular Elmer’s school glue or wood glue works just fine. Apply enough glue to hold the axles on, but be sure to use it sparingly enough so that it doesn’t ooze out and get on the wheels or axle screws. If you are building a Boy Scout style kit, no glue is necessary. Just inspect the nails for smoothness, removing any burs with a small metal file. Then stick the nails through the wheels and tap them into the pre-cut nail slots on the car. Be sure and keep the wheels as straight as possible. Tap the nails in far enough that the wheels do not wobble, but still spin freely. A common practice, to increase speed, is to add some graphite power or a drop of machine oil to the wheels where they contact the screws and axle. Be sure and check the official rules for your race before applying any oil. Many districts only allow dry lubrication and will disqualify you for using oil on the wheels. |
|